Creating a Wooden Toy Car: A Fun and Educational Project for Kids
Build a wooden toy car with your child using this fun and educational guide, complete with step-by-step instructions and creative tips for a memorable project together.
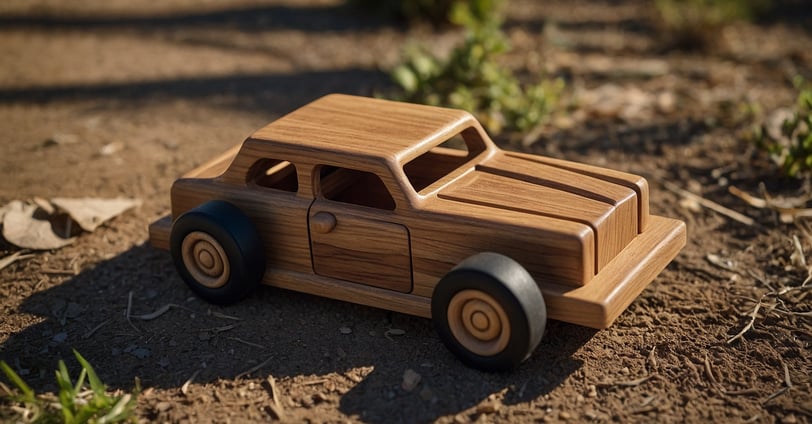
Introducing children to woodworking can be a wonderful way to spark their creativity and teach them valuable skills. One project that perfectly combines fun and learning is building a wooden toy car. This project is simple enough for beginners, yet offers plenty of opportunities for customization and creativity. In this blog, we’ll guide you through the process of making a wooden toy car, providing detailed instructions, safety tips, and creative ideas to make this a memorable experience for both you and your child.
Why Build a Wooden Toy Car?
Building a wooden toy car with your child is more than just a craft project; it’s an opportunity to teach important skills and create lasting memories. Here’s why this project is beneficial:
Hands-On Learning: Kids learn by doing, and this project teaches them about measurement, basic tool use, and the principles of construction.
Creativity: From choosing the design to painting the finished car, there are countless ways for kids to express their creativity.
Quality Time: Working on a project together provides a wonderful opportunity for bonding and creating memories.
Sustainability: Making toys from wood is environmentally friendly and results in durable, long-lasting toys.
Materials and Tools Needed
Before starting, gather all the materials and tools you’ll need. Here’s a list to help you get prepared:
Materials:
Wooden block (for the car body)
Wooden dowels or axles
Wooden wheels (available at craft stores)
Sandpaper
Non-toxic paint or stain
Wood glue
Tools:
Saw (a coping saw is good for detailed work)
Drill with bits (for axle holes)
Hammer (if needed for assembling parts)
Clamps (optional, for holding pieces together while glue dries)
Paintbrushes
Safety First
Safety is paramount when working with children on any project. Here are some tips to ensure a safe woodworking experience:
Supervision: Always supervise your child, especially when using tools.
Age-Appropriate Tools: Use tools that are appropriate for your child’s age and skill level.
Safety Gear: Equip your child with safety goggles and, if necessary, gloves.
Safe Workspace: Ensure your workspace is clean, well-lit, and free of hazards.
Step-by-Step Instructions
Step 1: Design Your Car
Before you start cutting, decide on the design of your car. You can draw a simple sketch or find templates online. This step is a great way to engage your child’s imagination.
Step 2: Cut the Car Body
Using a saw, cut the wooden block into the shape of a car. This might be a simple rectangle with rounded edges, or something more complex, depending on your design. Sand the edges to make them smooth.
Step 3: Drill Holes for the Axles
Mark where the wheels will go and drill holes for the axles. Ensure the holes are straight and level so the car will roll smoothly.
Step 4: Attach the Wheels
Cut the wooden dowels to the appropriate length for axles. Insert the dowels into the drilled holes and attach the wheels. You may need to use wood glue to secure the wheels if they don’t fit snugly on the dowels.
Step 5: Sand the Car
Sand the entire car to remove any rough spots and ensure a smooth finish. This is an important step for both safety and appearance.
Step 6: Paint and Decorate
Now the fun part – painting and decorating! Use non-toxic paint to add color to your car. Encourage your child to get creative with patterns, numbers, or even a name for their car. Allow the paint to dry completely.
Creative Customization Ideas
To make your wooden toy car truly unique, here are some ideas for customization:
Personalize with Initials or Name: Use letter stencils or freehand paint your child’s name or initials on the car.
Add Racing Stripes: Tape off sections and paint stripes for a sporty look.
Use Decals: Purchase decals or stickers to add details like headlights, windows, and logos.
Decorate with Markers: Let your child draw directly on the wood with markers for intricate designs.
Educational Benefits
Building a wooden toy car isn’t just about having fun; it’s also a great educational activity. Here are some skills your child will develop through this project:
Fine Motor Skills: Handling tools and small parts improves dexterity and hand-eye coordination.
Problem-Solving: Figuring out how to assemble the car and make it roll teaches problem-solving and critical thinking.
Math Skills: Measuring and marking wood introduces basic math concepts.
Creativity: Designing and decorating the car fosters artistic expression.
Creating a wooden toy car is a fantastic project that combines fun, learning, and quality time with your child. It’s a great way to introduce them to the world of woodworking while also creating a beautiful, functional toy that they can be proud of. Whether it’s their first project or one of many, building a wooden toy car is sure to be a memorable and rewarding experience.